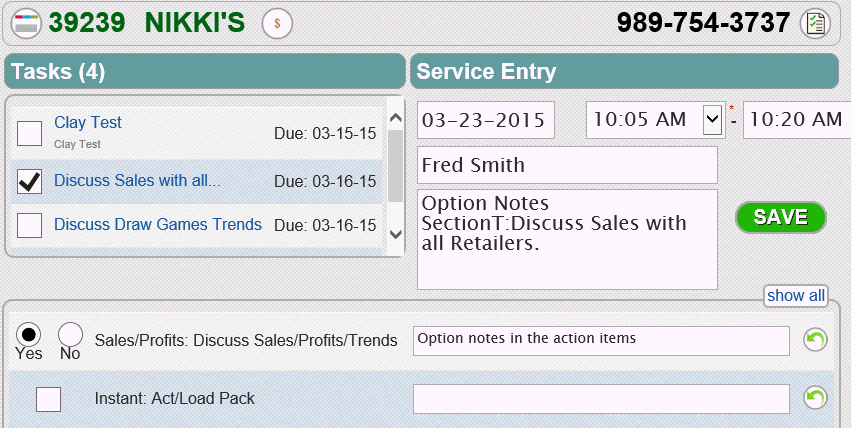
Follow the steps below to create a service entry from the Create Service Entry pane on the Retailers-Visits page.
1. To change from the current date to the date the service occurred, click in the Date field to display a drop-down calendar and select the date the service occurred.
2. Click in the Time fields to select the time range that the service occurred.
3. Optional: Enter a contact in the Contact Name field.
4. Optional: Enter notes in the Notes field.
5. Optional: Check/Uncheck any of the open Tasks to complete.
6. Select the Action check box(es) that apply to the service entry. Click the Show All button to show less common actions.
Optional: Enter any notes that pertain to the actions selected.
7. Click or touch the Save button to save your service entry. The service entry closes and appears as a line item on the History Page.
